Showing posts with label Breakfast. Show all posts

Super Fluffy Pancakes


Ingredients


750 ml milk or buttermilk
8 eggs, separated few drops of vanilla essence (optional)
600 g self-raising flour
100 g caster sugar about
125 g unsalted butter, for cooking

Method:


1. in one bowl, mix the milk or buttermilk and egg yolks, whisking until the egg yolks are combined. At this point the vanilla essence can be added, if using.

2. Place the egg whites in a second, large bowl, ready for whisking.

3. in a third large bowl, sift the flour and sugar, making a well in the centre. Pour the milk mixture
into the centre of the flour/sugar mixture and begin combining with a wooden spoon, slowly  rawing in the flour to form a thick batter. Do not worry if the mixture is excessively lumpy. By not whisking the milk mixture into the flour, you ensure that the flour is not overworked thereby  ightening the batter—also, the lumps NeVer appear in the final pancakes.

4. Whisk the egg whites until soft peaks form then fold into the batter.

5. cover and allow to rest in the fridge for 1 hour— although i’m unbelievably impatient and usually cook them straightaway.

6. cooking them requires the use of a large frying pan (or barbecue flat plate if you’re a large family) set on low–medium heat. add a good knob of the butter and melt. spoon in the pancake mixture according to your preferred size. When bubbles begin to appear evenly on the surface, turn over. The second side will only require 1–2 minutes to cook.


HINTS AND TIPS:


* You will need—3 bowls, whisk or electric beaters, large spoon, egg flip or spatula, frying pan, butter knife, weight and liquid measures.

* This super fluffy pancake recipe takes a little extra time and uses 3 bowls. Do not shy away, as the results are sensational.

* The mixture can be halved as it makes a very large batch (enough for my 7 children and us parents). Any leftover batter will last until the next day; after that, however, the egg whites will begin to lose their bubbles and the mixture will become grey and lifeless.

* Toppings can range from the usual suspects—maple syrup, lemon and sugar, grilled banana or fresh berries—to the more exotic, poached rhubarb, blueberries in vanilla syrup, confit pineapple or honeycomb
butter—all of which love ice-cream!

* Leftover mixture can also be cooked into smaller pancakes, refrigerated and used in school lunch boxes the next day.

* Whisking the egg whites is entirely optional. The egg whites certainly do make a difference, giving the pancakes a ‘light as air’ texture. But time and washing up permitting, simply beat the whole eggs into the milk
and stir the wet mixture into the dry mixture. Remember to not overwork the batter.

* Cooking the pancakes in butter gives the edges of the pancakes a crisp, frilly side which is a delight to eat and a great contrast to the soft, fluffy centre

    Slow-Roasted tomatoes


    Ingredients


    1) 8 roma or vine-ripened tomatoes
    2) 3 tablespoons olive oil
    3) 2 tablespoons salt flakes
    4) 1 tablespoon freshly ground black pepper


    Method:


    1. Preheat the oven to 110ºc..

    2. slice the tomatoes in half and place, cut side up, on a baking tray lined with baking paper

    3. Brush or drizzle with the olive oil. sprinkle with the salt and pepper.

    4. roast in the oven for 3 hours.

    5. remove from the oven, cool and keep refrigerated, covered, for up to 5 days.


    HINTS AND TIPS:


    * You will need—cutting board, cook’s knife, spoon measure, baking tray and baking paper.

    * These tomatoes freeze well for up to 2 months.

    * Try adding 2 thinly sliced garlic cloves, placed on the tomatoes, before roasting.

    * The marriage of basil and tomato is perfect, so try adding 6 basil leaves. You can also use other herbs like oregano, parsley, mint or thyme. Chop the herbs finely and sprinkle over the tomatoes before roasting.

    * Finely chop 4 shallots or 1 small brown onion and sprinkle over tomatoes before roasting. Shallots are favored over onions as they
    tend to be less pungent, but they are a bit more fiddly to peel and chop.

    * Roasted tomatoes are fantastic with breakfast, in a salad, chopped into a frittata, served with roasted or grilled meats, or on a mezze or antipasto platter.

    * Once cooked, drizzle tomatoes with balsamic vinegar and scatter with
    goat’s cheese; serve with a simple salad or as a side dish.

    * To use with pasta—peel skins from the roasted tomatoes and place in a food processor, then blitz to make a simple yet full-flavoured passata (fine tomato sauce). Homemade tomato sauce is an indispensable ingredient in any kitchen, especially for beginner cooks looking for an
    easy meal.

    * For good storage of the roasted tomato sauce—place the hot puree in sterilized jars and seal with a lid. The heat from the sauce will create a vacuum while cooling.

    * For a juicier sauce, try cooking the tomatoes at a higher temperature for a shorter time. Preheat the oven to 170ºC and roast for 1½ hours until softened. These tomatoes are less intense but still very tasty;
    try grilling or pan frying when reheating, or simply puree to use as pasta sauce

    Scrambled Eggs


    Ingredients


    1) 4–6 eggs (depending on size)
    2) 2 tablespoons thick cream (35 per cent fat) salt and freshly ground pepper, to taste
    3) 75 g butter
    4) chopped chives, to garnish


    Method:


    1. in a bowl, crack the eggs, add the cream and season with salt and pepper.

    2. Whisk lightly with a fork—the whites and yolks don’t have to be completely mixed and the mixture should contain some air; over-whisking the mixture expels the air and makes for heavier scrambled eggs

    3. Melt the butter in a heavy-based nonstick pan over medium heat. When the butter begins to bubble, add the egg mixture and reduce heat to low. as it begins to cook and thicken, fold the thicker bits towards the centre of the pan—uncooked egg will moat around the cooked egg.  epeat this process until the eggs are close to ready but still a little runny, then remove from the heat and move the mixture once or twice more as the heat of the pan will complete the cooking.

    4. serve immediately—scrambled eggs become tough and dry if you attempt to keep them warm. Garnish with the chives or other fresh green herbs.


    HINTS AND TIPS:


    * You will need—bowl, whisk or fork, weight measure, silicon spatula and nonstick pan.

    * For great tasting eggs, try to source eggs from a farmers market or at the very least use free range eggs.

    * The degree to which people like their eggs cooked—whether scrambled, poached, fried or boiled—can vary greatly. However, the two most common are runny and hard. This is very true when making scrambled eggs, so as much as this recipe calls for the eggs to be just set, some may feel it necessary to cook them to within an inch of dust; this is completely up to the individual. Expect that in restaurants eggs should always be ‘just’ cooked, and it is up to the customer to express ‘firm’ or
    ‘well done’ when ordering.

    * If cooking scrambled eggs for more than 2, then Unfortunately it becomes a Lengthy process. Too many serves in one pan, although
    Achievable, will create havoc with overcrowding, possibly Causing much spillage. Also, it would mean the eggs are exposed to heat for a longer
    period, meaning that while some parts of the eggs are not cooked, other parts are beginning to overcook, become rubbery and then watery.

    * Cooking scrambled eggs on a high heat can be done; however, there is the risk of browning parts of the eggs and leaving unsightly spots throughout the mixture. Also, eggs are a delicate protein that do not respond well to high heat.

    * Adding cream—as this recipe suggests—results in very smooth, creamy and decadent scrambled eggs. Replacing the cream with milk or low fat milk can be done, but be very careful not to overcook the eggs as it will toughen the mixture and leave you with a heavily weeping mass of tough egg curds and watery milky whey as the proteins in milk also overcook and coagulate.

    * For lactose intolerance, use 2 tablespoons of water Instead of cream or milk—Again, so long as the mixture is only just cooked, this Version of scrambled eggs can still be quite amazing. Water added to scrambled
    egg mixture can create fluffy eggs as the water begins to steam the beaten eggs. * Surprising as this may seem, serving scrambled eggs
    for an entrée at a dinner party can be quite a hit. A regular serve of scrambled eggs (2 eggs per person) plus some smoked salmon and
    a small green salad is a very acceptable way to begin a meal.

    * For an extra special treat, just as the eggs are nearly ready, add
    1 tablespoon mascarpone cheese or crème fraîche or 2 tablespoons goat’s cheese. Stir once or twice and serve.

    * This recipe for scrambled eggs can be slightly undercooked and then poured onto 2 tortillas. Top each one with ¼ avocado and a slice of good ham then roll like a burrito, place on a tray and top with a small handful of grated tasty cheese. Bake in a hot ovenm (210°C) for 5 minutes. Breakfast Burrito! Tabasco sauce or a fresh salsa made of 1 fresh tomato (chopped), ½ red onion (chopped), 2 tablespoons chopped coriander, salt and pepper, and 1 tablespoon extra virgin olive oil will finish this breakfast or brunch meal.

    Omelette


    Ingredients


    1) 3 large eggs
    2) 2 tablespoons warm water large pinch of salt flakes pinch of ground white pepper
    3) 2 tablespoons butter
    4) 1 teaspoon olive oil


    Method:


    1. combine the egg, water, salt and pepper in a bowl and whisk until well combined. The water evaporates as the omelet cooks making it light and fluffy.

    2. Place a nonstick frying pan over medium–high heat, add the butter and olive oil and heat until the butter begins to bubble without browning.

    3. add the egg mixture to the pan. as the egg begins to set, use a rubber or plastic spatula to  over the egg from the outer part of the pan to the middle, to allow the uncooked egg to fill any exposed parts of the pan.

    4. When half-cooked and still runny on top, add any flavors’ you like (some ideas are listed  opposite and continue to cook until set or better still cook the top of the omelet under the grill section of the oven. This will only take 1–2 minutes.

    5. remove from the heat and shake the pan to loosen the omelet from the base of the pan.  hake the omelet to one side, tilting so that the top third can be folded over, and then turn onto a plate.


    HINTS AND TIPS:


    * You will need—cutting board, cook’s knife, bowl, spoon measures, hisk,
    spatula, shallow frying or sauté pan or crepe pan.

    * This recipe is a classic French-style omelet which means it is folded as it is served. Another version is the Spanish omelette which is not folded, but served flat from the pan. Fans of the Spanish omelette have been known to cook their omelet in a shallow terracotta baking dish, eating it
    straight from the dish.

    * A simple mixture of chopped fresh herbs can be added to the egg mixture. A quantity no more than 1 tablespoon of chopped herbs like parsley, thyme, sage, oregano, mint, chervil or tarragon can be used in any combination.

    * Bacon, spinach and goat’s cheese omelette—1 rasher of bacon (chopped and fried), 1 cup spinach (chopped and wilted by cooking it in the pan after the bacon), and ¼ cup goat’s cheese (crumbled). Loosely mix all ingredients in a bowl, ready to place in the middle of the half-cooked omelette. The goat’s cheese can be replaced with fetta, ricotta, brie or
    grated cheddar.

    * Mushroom, tomato and spinach omelet—1 cup sliced Swiss brown mushrooms (cooked in 2 tablespoons olive oil), 1 ripe tomato (peeled, de-seeded and chopped), and 1 cup spinach (chopped and wilted by cooking it in the pan after the mushrooms). Loosely mix all the ingredients in a
    bowl, ready to place in the middle of the half-cooked omelet. Fresh tomato can be replaced with ¼ cup semi- or sun-dried tomatoes. spinach
    can be replaced with rocket. Mushrooms can be replaced with grilled artichoke hearts.

    * Try other fillings like some of the combinations mentioned in the hints and tips list for frittata.

    * An omelet is considered a benchmark for any good chef, a sign of solid
    training and of a good understanding of the basics. In some kitchens, fail the omelet test and you fail to get the job. Domestic cooks need not place so much pressure on themselves, just remember practice makes perfect.

      HasH brown potato

      Ingredients


      1) 500 g (about 2 large) potatoes
      2) 2 tablespoons vegetable or canola oil
      3) 2 tablespoons butter salt and pepper, to taste


      Method:


      1. scrub the potatoes—they do not need to be peeled—then coarsely grate. Squeeze the grated potato slightly to remove some of its water (this makes for a crispier end result).

      2. heat a 30-cm frying pan, preferably nonstick, over medium–high heat. add the oil and butter.

      3. When hot, add the potatoes and push down with a spatula to spread evenly in the bottom of his pan. Sprinkle the top with salt and pepper. cook until the bottom is browned and crispy, about 10 minutes. Do not try to flip until it is browned, or the potatoes might stick.

      4. flip the hash brown, cut into sections if necessary, and cook another 10 minutes, or until browned and crispy on the other side.

      5. serve immediately, or cool and simply reheat in the microwave or preferably in a hot oven 210°c for 5 minutes.


      HINTS AND TIPS:


      * You will need—grater, bowl, weight and spoon measures, nonstick frying pan and spatula.

      * There are many different styles of hash browns. This recipe is about as easy and as fast as they come-and is, in fact, that of a Swiss potato dish called ‘Potato rosti’. Other recipes suggest boiling and mixing the potato with all kinds of ingredients—they’re not wrong. So the term ‘hash brown’ becomes quite loose, especially when made with sweet potato or even carrots.

      * A standard supermarket potato is all that is required, this usually means a Sebago, Coli ban or Nadine.

      * To avoid discoloration of the grated potato, work quickly and squeeze the moisture out as soon as possible. If making a large batch, keep the grated potato in water until ready to assemble, then be sure to
      thoroughly squeeze out all the water before cooking.

      * If using a nonstick pan, the use of oil and butter can be eliminated to reduce fats in the diet.

      * For a variation, after squeezing excess moisture from the grated potato, try adding 1 egg yolk, 1 onion (finely chopped) and ¼ teaspoon hot (or mild) paprika. Instead of paprika, ½ teaspoon of finely chopped
      herbs like rosemary or sage marry well with potato.

      * Or add the kernels from a cob of corn to the recipe with 1 tablespoon chopped parsley, ½ red capsicum
      (chopped) and 1 fresh red chili (chopped). Then top this with Guacamole and bacon.

      * Once cooked, top regular hash browns with crispy bacon then grated cheese and finish in a hot oven for 5 minutes.

      Fruit salad


      Ingredients 

      1) ¼ rockmelon (cantaloupe), peeled and seeds removed
      2) ¼ pineapple, peeled and cored
      3) 1 apple, peeled and cored
      4) 2 bananas, peeled
      5) 1 cup green grapes, washed
      6) 2 passionfruit natural yoghurt, to serve

      Method:

      1. cut the rockmelon, pineapple, apple and banana into roughly 2-cm pieces.

      2. Mix all the fruit in a bowl then serve with fresh, natural yoghurt.

      3. store the fruit salad (without the yoghurt) in an airtight container for up to 2 days.

      HINTS AND TIPS:


      * You will need—cutting board, cook’s knife, peeler, paring knife, cup measure, bowl and storage container.

      * This is the most basic fruit salad recipe and can therefore be adapted to any fruit, but please consider the following tips.

      * When cutting fruit, it is recommended that all fruit is cut the same size, but not necessarily the same  hape. This means fruit can be cut into large pieces, about 5 cm, or into small pieces, 1 cm or less—but don’t be tempted to mix the two sizes as it will look odd, and the smaller pieces can become damaged and mushy from the size and weight of the larger pieces.

      * Never be tempted to add many fruits to a fruit salad to make it impressive. Sometimes a combination of 3 well-matched fruits is better than having a mixture of 10.

      * Fruit salad is best eaten on the day or, at the very latest, the next day. Some fruits will certainly last longer; however, once mixed, some soft fruits will rapidly break down.

      * Bananas, being a very soft fruit, should only be added just before serving. Once mixed and then stored,  anana in a fruit salad will begin to soften quickly and become brown and mushy, making a great fruit salad look unappetising the next day.

      * Think about matching hard fruits (as in the recipe) or soft fruits (as in the examples below).

      * Melon fruit salad—a mix of equal parts watermelon, rockmelon and honeydew. * Mixed berry and mango salad—once in season, make the most of fresh berries and counter their tartness by adding a mango cut into small pieces.

      * Pineapple, papaya and mint salad—mix ½ pineapple, 1 pink papaya (peeled and black seeds removed) and ¼ cup shredded mint. * Citrus fruit salad— 4 oranges, 6 mandarins, 2 pink grapefruit and 1 lime (mint would go well with this salad).

      * Banana, strawberry and passionfruit salad—3 bananas, 300 g strawberries and 3 passionfruit (the passionfruit will prevent the banana from browning).

      * Strawberry, grape and mango salad—500 g strawberries (hulled and quartered), 500 g green grapes  washed) and 3 mangoes (cut into 2-cm pieces).

      * Tropical fruit salad— make use of any tropical fruits like papaya, lychee, mango, longan, dragon fruit, pineapple, star apples, carambola (star fruit), chocolate pudding fruit, mangosteen and bananas.

      French toast


      Ingredients

      1) 4 eggs 250 ml milk
      2) 1 teaspoon ground cinnamon
      3) 2 tablespoons caster sugar
      4) 1 teaspoon vanilla essence 150g butter
      5) 4 slices of sourdough bread or thickly sliced white bread
           (French bread stick and turkish bread will also work)

      Method:

      1. Place the eggs, milk, cinnamon, sugar and vanilla essence in a bowl and whisk.

      2. Heat a frying pan or the flat plate of a barbecue (on lowest setting) and melt the butter. soak  ach slice of bread in the egg mixture until wet through.

      3. Place the soaked bread in the pan or on the flat plate and cook until golden brown. turn and  ook the other side. It is important to cook on a low–medium setting so the egg mixture cooks and sets, rather than cooking on a higher heat which will burn the outside and leave the inside soggy.

      4. Once cooked, transfer to a plate and serve with your choice of toppings—bacon, maple syrup, honeycomb butter, fresh berries, ice- cream or lemon and sugar—or simply eat it on its own.

      HINTS AND TIPS:


      * You will need—cutting board, bread knife, weight, spoon and liquid measures, sauté pan or frying pan.

      * French toast, like pancakes, is great for a special weekend breakfast. French toast is certainly much easier to prepare than pancakes and is a great place to start for beginner cooks.

      * This dish is also known as ‘edgy bread’ in the UK; and in France, it is known as ‘pain perdu’.

      * Cooking French toast in butter adds to the richness of the dish.

      * Adding milk to the eggs is optional. Using just eggs mixed with the spices and sugar will give a richer and more eggy flavors.

      * You could take 2 pieces of bread and sandwich sliced bananas or grated apple between them, then dip the sandwich in the egg mixture before frying.

      * For a child’s birthday party, use star- or people shaped cutters to cut shapes from the bread before cooking.

      * Try serving French toast as a dessert instead of a breakfast dish.

      * French toast is often served as a sweet dish but can work as a savory alternative. Try replacing the cinnamon, vanilla and sugar with 1 cup grated parmesan cheese and salt and pepper to taste. Dip the
      bread in the egg mixture before cooking.

      Boiled eggs


      Ingredients 


      1. Hens’ eggs
      2. Room temperature water


      Method:

      1. There are many written methods for boiling an egg—see Hints and tips for why this one is the est.

      2. Gently place room temperature eggs into a saucepan and cover with cold water by at least 5 minutes.

      3. Bring the water to the boil, then turn down to a barely recognizable simmers for 8–10 minutes for hardboiled eggs. For the best results, the water should not be boiling. See Hints and tips for soft- oiled eggs.

      4. Remove from the water with a slotted spoon and drop into cold or iced water to stop the cooking. Boiled eggs in the shell will keep in the fridge for 7 days.


      HINTS AND TIPS:


      * You will need—saucepan and slotted spoon.

      * As tempted as you are to drop eggs from the fridge into boiling water, stop now and read on. The main reason eggs crack when boiled is due to temperature difference. A cold egg cooked in hot water will most probably crack, and no amount of salt or vinegar in the water will prevent this. All salt and vinegar can hope to achieve is to quickly set the egg white that flows from a cracked egg. The other reason is that eggs cooked in a rapid boil are knocked about, causing the egg to crack.

      * The only reason why eggs are hard to peel once boiled is because they are very fresh. The fresher the egg, the harder it is to peel. The best eggs for boiling and then peeling are those that are about 2 weeks old. Keep the really fresh ones for poaching, frying or scrambling and for making cakes.

      * For really soft eggs—both yolk and white—use the method mentioned, but remove the eggs after 2–3 minutes instead of 10 minutes. These are also known as ‘coddled eggs’.

      * For soft yolks and set whites, cook for 5 minutes. For a medium cooked yolk, cook for 6–7 minutes.

      * All these times are approximations and much depends on the size of the egg, temperature of the egg
      and even the temperature of the water added in the beginning.

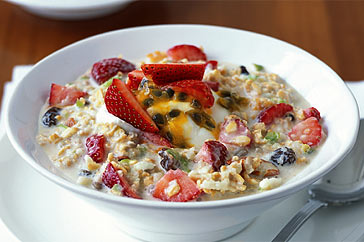
      Bircher muesli


      Ingredients

      1 cup rolled oats
      ½ cup fresh orange juice
      ½ cup natural yoghurt
      ¼ cup currants or sultanas
      ¼ cup chopped dried apricots pinch of ground
      nutmeg large pinch of ground cinnamon
      1 Granny smith apple, grated, to serve
      2 tablespoons natural yoghurt, extra
      1 cup seasonal fresh berries, to serve


       Method:


      1. combine the oats, juice, yoghurt, currants or sultanas, chopped apricots, nutmeg and cinnamon in a large bowl and stir well. chill overnight.

      2. To serve, stir in the grated apple, put into serving bowls and garnish with the extra yoghurt and the berries.


      HINTS AND TIPS:


      * You will need—large bowl, vegetable peeler, grater, cup, liquid and spoon measures and a large spoon.

      * When in season, passionfruit is a wonderful addition to bircher muesli, so try adding the pulp of 4  assionfruit to this recipe. If you cannot wait for the season to begin, use a small can of passionfruit pulp, readily available at the supermarket.

      * There are many varied recipes for bircher muesli and it should be remembered that this recipe like all recipes in this book—is just a guide and so the addition of a favourite ingredient or removal of any gredients that are not so liked is easy and encouraged.

      * For gluten intolerance, the use of ‘oat’ style cereals can be substituted. One in particular is made from rice-meal; however, like most foods that are a gluten substitute, the end result will certainly have a different texture, one which coeliacs are quite used to. * For a dairy-free option, simply replace the yoghurt with the same quantity of orange juice, or any other fruit juice, like apple, pineapple, mango, apricot or peach.

      * Fruit yoghurts can be substituted for natural yoghurt, the only difference being that the end result will be just a bit sweeter.

      * Any dried fruit can be substituted for the ones mentioned in the recipe, as long as the overall quantity for this recipe doesn’t exceed ½ cup.

      * Other spices that could be used in this recipe include mixed spice or allspice to replace the cinnamon and nutmeg. If no spices are on hand, simply omit from the recipe altogether.

      * As much as bircher muesli is intended for breakfast, it makes for a great afterschool snack for very hungry children.

      * Once made, store the muesli in an airtight container in the refrigerator for 2 days. Even though it may last up to 5 days, it does begin to break down too much by day 3 and is considered a fresh product once the  range juice is added.

      * Mixing in freshly grated apple adds a refreshing crunch to the bircher muesli. Topping with yoghurt and berries is just one example of how to serve this dish. Serving a dollop of bircher muesli with cold milk is
      simple and still delicious. Chopped fresh banana or melons can replace the fresh berries.